Equipment for Medical Photographers
In this article :
In the field of medical photography, every detail matters. Whether for post-operative follow-up, an aesthetic medicine record, or a report within a healthcare center, the quality of an image depends not only on the photographer’s eye but also on the precision of their equipment.
Good equipment is not limited to sensor resolution or flash power. It must be reliable, consistent, ergonomic, and capable of faithfully capturing textures, skin tones, and the subtle nuances that medical practice demands.
Here are the essential tools for every medical photographer, along with some technical recommendations to get the best results in any clinical situation.
Recommended Cameras
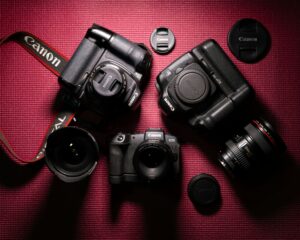
In medical photography, the priority is color accuracy and sharpness. Professional DSLR and mirrorless cameras are best suited to meet these requirements.
Full-frame bodies offer excellent detail reproduction and precise control over depth of field. Models such as the Canon EOS R5, Nikon Z7 II, or Sony A7R IV are often preferred for their exceptional sharpness and light handling.
APS-C bodies (like the Canon R7 or Fujifilm X-T5) remain a solid alternative for medical facilities seeking more compact equipment while maintaining excellent image quality.
Key takeaway: rendering reliability outweighs raw performance. A medical camera must be stable, consistent, and calibrated to produce homogeneous series of images.
Lenses
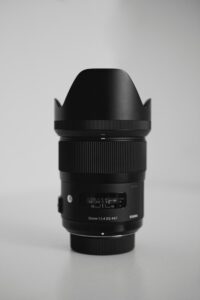
Choosing the lens is just as crucial as selecting the camera body. In medical photography, the lens must provide faithful reproduction of proportions, without distortion or warping.
Macro lenses (such as a 100mm f/2.8 or 105mm f/2.8) are essential for capturing small details: scars, sutures, dentition, or skin textures. They allow close-up photography while maintaining perfect sharpness.
For medical portraits or full-face images, a focal length between 50mm and 85mm ensures a natural rendering, without a wide-angle effect.
Using a medium aperture (f/8 to f/11) provides sufficient depth of field so that every relevant area of the image is sharp, from foreground to background.
Lighting
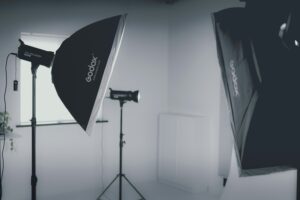
Poorly controlled lighting can compromise a medical image. The goal is not to create an aesthetic atmosphere, but to achieve consistent, soft, and reproducible illumination.
Ring flashes are particularly suited for close-up shots (faces, dermatological or oral areas) because they provide uniform light without cast shadows.
For portraits or posture photography, LED panels with adjustable color temperature are ideal. They allow you to adapt the light to the patient’s skin tone or the ambient room lighting.
Practical tip:
- Use a gray card (X-Rite ColorChecker) to calibrate your lighting before each session.
- Avoid mixed lighting (natural + artificial light), which distorts the white balance and makes before/after comparisons unreliable.
Useful Accessories
A medical photographer must be able to work quickly and efficiently in often confined environments. Certain accessories therefore become essential:
- Stable tripod: to ensure reproducibility between successive shots.
- Neutral background (white, gray, or medical blue): to standardize shooting conditions and facilitate potential image masking.
- Remote shutter release: to avoid micro-vibrations during macro shots.
- Calibrated monitors: so that color rendering is consistent between the camera, computer, and prints.
- High-speed memory cards and secure drives: to efficiently archive and guarantee the confidentiality of medical images.
All of this equipment contributes to reliable, reproducible, and legally compliant medical photography — three essential requirements for any professional in the field.
Technological Innovations
Medical photography evolves with technology. New imaging tools simplify workflows while improving result quality.
Connected systems (such as automatic calibration software and secure image management platforms) now allow photos to be linked directly to the patient record while complying with GDPR standards.
Innovations like automatic focus stacking ensure perfectly sharp images, even at very close distances.
Finally, advances in artificial intelligence facilitate automatic detection of blurred areas, intelligent cropping, or color correction, without compromising the medical reliability of the image.
Conclusion
Good equipment is an ally, not a guarantee. In medical photography, technique can never replace an understanding of the procedure and the clinical objective.
The photographer must know how to adapt their equipment to each situation: soft lighting for post-treatment portraits, precise macro for dermatological details, or diffuse lighting for operating room images.
At Rétines, we support practitioners and photographers in implementing comprehensive medical visual solutions, combining equipment, methodology, and guidance.
Every image must be accurate, faithful, and compliant, serving responsible and aesthetic medical communication.
Jérémy Carlo is the editorial director at Rétines, where he ensures the consistency and clarity of all content produced by the studio.
Our Clients


Let’s discuss
What we do for you at Rétines
Meticulous work, an organised project and fast delivery. And to achieve this, we mobilise the right resources in our teams at the right time.
01
Pre-production
Artistic and technical direction tailored to the project.
Relevant recommendations on content, form and resources.
02
Photo Shooting
Photos taken by our experienced photographers.
Production that’s controlled, efficient and tailored to the needs of the project, with nothing superfluous.
03
Retouching
Technique
Photographs magnified by our retouching team.
Post-production to meet the commercial challenges of the brief.