Guide to Bottle and Spirits Photography
In this article :
Photographing bottles and spirits requires specialized expertise, as it involves capturing liquids that are often complex due to their translucency and their uniquely shaped containers.
These subjects, with their reflective surfaces and aesthetic compositions, present unique challenges that set them apart from more conventional product photography.
At Rétines, we have mastered the art of wine and spirits photography through years of professional experience, using state-of-the-art equipment and paying meticulous attention to every detail.
This bottle photography guide is designed to provide you with tips and insights, enabling you to conduct your own product photo shoots with confidence and efficiency.
Before the Photo Project
Defining the Need
Before setting up your first light or choosing your camera, it is essential to define the direction of your photoshoot. Think about what you want to convey through your spirit images.
What information should be highlighted? How can your brand visually stand out in a competitive market? This initial step not only determines the appearance of your photos but also how they will communicate your brand’s values.
Creating a Moodboard
A moodboard is an excellent tool for crystallizing and communicating your vision. Compile images, textures, colors, and patterns that capture the essence of the style you are aiming for in your photography.
This inspiration board will serve as a reference throughout the shooting process, ensuring a consistent visual style that reflects your brand identity. You can use Pinterest, which remains the most practical tool for both compiling images and obtaining relevant content suggestions.
Consistency with Brand Identity
Ensure that all aspects of your artistic direction, from colors to image style, are in harmony with your brand’s overall identity. The goal is to strengthen your brand image with your target audience through visuals that are instantly recognizable.
Planning and Logistical Organization
Logistics are crucial for a successful photoshoot. Carefully planning every detail beforehand will help you maximize efficiency on the big day.
Finding the Right Collaborators
Whether it’s a bartender, a food stylist, or a set designer, it’s important to understand the needs of the project and the resources required to mobilize the right talents.
Listing Products
Create a comprehensive list of bottles and spirits to be photographed. This will allow you to plan the shooting order and ensure that all necessary products are ready and accessible.
Scenography
Consider how you want to position your products. Do you want close-up shots that capture label details, or more elaborate arrangements that showcase the bottles in a sophisticated bar setting? Also, plan the necessary accessories and decorative elements to enrich your compositions.
Scheduling
Establish a detailed schedule for the day, allocating enough time for each type of shot. Include buffers for necessary adjustments and any unforeseen events.
Basic Equipment
Choosing the right equipment is essential for achieving professional results in wine and spirits photography. Here are the essential elements:
Camera
Whether you choose a high-end DSLR or a quality smartphone, select a camera that suits your specific needs and budget.
Tripod
A sturdy tripod is essential to ensure camera stability and achieve sharp images, especially in low light conditions or close-up shots.
Lighting
While natural light is often preferred for its softness, it is not always available or sufficient. Continuous lighting or flashes will help you control and shape the light to create the desired ambiance.
Background
Opt for a neutral background, such as off-white or a soft color, which highlights the spirits without distracting from them.
Lens (and Perspective)
Using a macro lens can be especially effective for capturing precise details on labels or within the bottle. Choosing the right angle is also crucial; often, a slight elevation above table level provides an engaging view that highlights the bottle’s shape and the depth of the spirit.
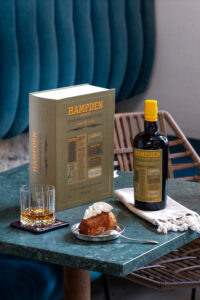
Composition and Context
Incorporating contextual elements can enhance your photography. For example, placing ingredients next to the bottle can evoke the spirit’s flavor and add a narrative touch to the image. Additionally, adjusting the composition to include elements like a glass beside the bottle can invite the viewer to imagine the pleasure of tasting the drink.
Shooting
Wine and spirits photography is an art that requires precision, creativity, and a deep understanding of shooting techniques. At Rétines, we have refined our methods over the years to capture the essence and beauty of these refined products. Let’s explore the essential aspects of this unique photographic discipline.
Bottle Placement
The positioning of the bottle is the cornerstone of successful wine and spirits photography. A well-thought-out placement can highlight the product’s unique features and create a visually appealing composition.
Viewing Angle
The chosen viewing angle can significantly influence the perception of the product:
- Front View: Ideal for highlighting the label and the general shape of the bottle. This approach works particularly well for bottles with classic shapes or elaborate labels.
- High Angle: A slightly elevated angle (around 15-20 degrees) is often flattering, revealing the bottle’s silhouette while keeping the label visible. This technique effectively creates a sense of depth and dimension.
- Low Angle: Less common but effective for large spirit bottles, this perspective can give an impression of grandeur and prestige to the product.
Orientation
The orientation of the bottle can vary depending on the type of product and the desired effect:
- Vertical: The classic orientation, especially suitable for wine bottles. It highlights the elegance and verticality of the product.
- Tilted: A slight tilt can add dynamism to the image, especially for spirits. It can also be used to create a more interesting composition or to emphasize specific aspects of the bottle.
- Horizontal: Less conventional, this orientation can be used for creative compositions or to highlight specific details of the bottle or label.
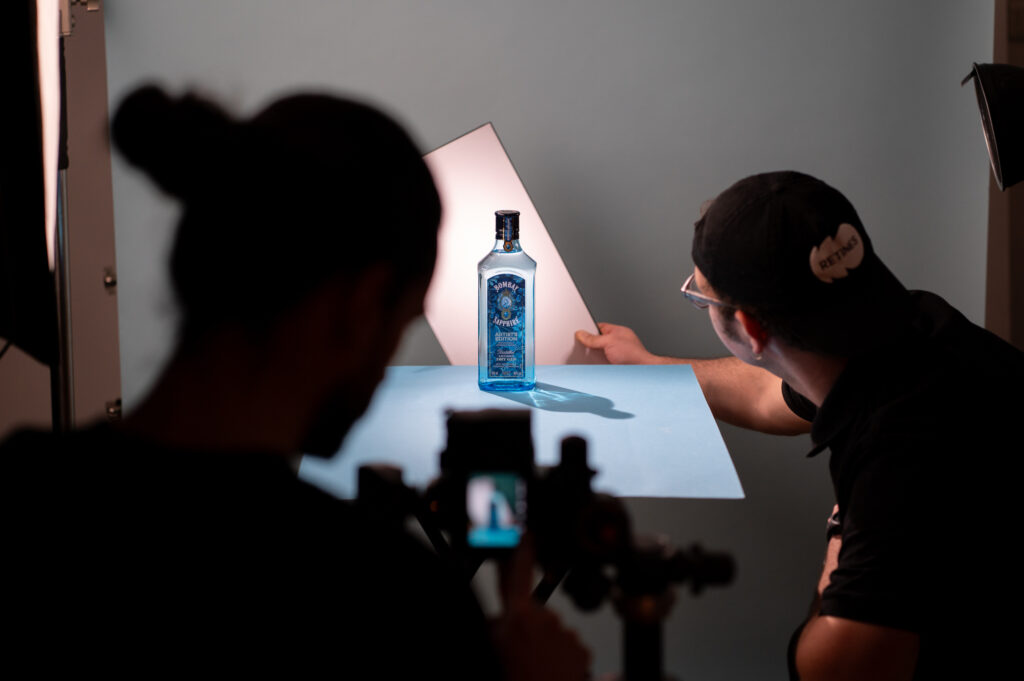
Lighting:
Lighting is crucial in wine and spirits photography. It shapes the perception of the product, highlights its unique features, and sets the overall mood of the image.
Main Lighting:
The main light is the dominant light source that defines the shadows and contours of the bottle:
- Position: Place your main light source at approximately 45 degrees to the bottle. This angle reveals the bottle’s shape while creating soft shadows that add depth to the image.
- Light Quality: Use a diffuser to soften the light and avoid harsh reflections on the bottle’s surface. A softbox or translucent umbrella are excellent tools for achieving soft, flattering light.
- Intensity: Adjust the intensity of your main light depending on the color and transparency of the product. Dark red wines may require more powerful lighting, while clear spirits benefit from softer light.
Secondary Lighting:
Secondary lighting, or backlighting, is essential for highlighting the transparency and color of the liquid:
- Position: Place a light source behind the bottle, slightly offset, to create a nice separation from the background. This technique is especially effective for clear spirits and white wines.
- Intensity: Adjust the backlighting intensity to reveal the color of the liquid without overexposing. The goal is to create a glowing halo around the bottle, accentuating its shape and transparency.
- Filters: Experiment with colored filters on your backlight to subtly enhance or alter the liquid’s color. This technique can be particularly interesting for spirits.
Fill Lighting:
Fill lighting helps control shadows and add subtle details to the image:
- Reflectors: Use white or silver reflectors to bounce the main light and gently illuminate shadow areas. This reduces contrast and reveals more details on the label and bottle.
- Fill Light: A secondary light source with low intensity can be used to light the side opposite the main light, reducing harsh shadows.
- Accent Lighting: Small, focused light sources can be used to highlight specific details like an embossed logo or a particular texture on the bottle.
Shooting Steps
Follow these steps to achieve professional results when photographing wine and spirits:
1. Background Setup
The choice of background is crucial to showcase your product:
Neutral Background: Opt for a backdrop that doesn’t distract from the bottle. White, light gray, or black works well for most products.
Texture: Consider using subtly textured backgrounds to add depth to the image. Surfaces like marble or wood can elegantly complement certain types of wine or spirits.
Context: For some shots, a contextual background (like a blurred wine cellar or an elegant bar) can add a narrative dimension to the image.
2. Bottle Positioning
The bottle’s position is critical for a successful composition:
Alignment: Place the bottle on the background, ensuring it is perfectly straight (unless you’re aiming for a tilted effect).
Rotation: Rotate the bottle so that the label is perfectly visible and readable.
Spacing: If photographing multiple bottles, ensure even spacing for a balanced composition.
3. Setting Up Main Lighting
The main light defines the overall mood of your image:
Positioning: Place your main light source at approximately 45 degrees to the bottle.
Height: Adjust the light height to create natural shadows that emphasize the bottle’s shape.
Diffusion: Use a diffuser to soften the light and avoid harsh reflections on the bottle surface.
4. Adding Backlighting
Backlighting is essential to highlight the product’s transparency and color:
Placement: Position a light source behind the bottle, slightly offset to avoid direct reflections in the lens.
Intensity: Adjust the intensity to enhance the product’s transparency without overexposure. Aim for a glowing halo around the bottle.
Filters: Experiment with colored filters to subtly enhance or alter the liquid’s color.
5. Camera Settings
Accurate camera settings are essential for a high-quality image:
Tripod: Mount your camera on a stable tripod to avoid any camera shake.
Aperture: Set the aperture between f/8 and f/11 for a good depth of field, ensuring the entire bottle is sharp.
Shutter Speed: Adjust the speed according to your lighting. With a tripod, slower speeds can be used if necessary.
ISO: Keep the ISO as low as possible (ideally 100 or 200) to minimize digital noise.
6. Focusing
Precise focusing is crucial for image sharpness:
Focal Point: Focus on the label or logo of the bottle to ensure maximum sharpness on key elements.
AF Mode: Use spot autofocus for precise focus, or switch to manual focus for complete control.
Verification: Use the preview zoom function on your camera to check the sharpness of important details.
7. Test Shots
Test shots are essential for refining your setup:
Analysis: Take a few test shots and review them carefully on your camera screen or, ideally, on a computer.
Adjustments: Modify lighting, bottle position, or camera settings based on these tests.
Histogram: Check the histogram to ensure the exposure is correct, avoiding overexposed or underexposed areas.
8. Shooting Sequence
Once your setup is optimized, it’s time for the final shoot:
Variations: Capture multiple shots, slightly varying the angle or lighting to have options during selection.
Details: Don’t forget to take close-ups of important details, such as the label, cap, or glass texture.
Advanced Techniques
To elevate your images to the next level, consider these advanced techniques:
Focus Stacking: This powerful technique ensures perfect sharpness across the entire bottle.
Reflection Control: Mastering reflections can add a professional touch to your images.
Reflector Cards: Use black or white cards to create controlled reflections on the bottle’s surface.
Water Droplets: For cold bottles, adding water droplets can create a highly appealing freshness effect.
At Rétines, we understand that every bottle, every wine, and every spirit has its own story to tell. Our expertise in still life photography allows us to capture the essence of these refined products, creating images that not only catch the eye but also evoke the senses of taste and aroma. Whether you want to showcase a fine vintage or launch a new range of cocktails, our team is ready to take on the challenge, turning every shot into a unique visual experience.
In the world of wine and spirits photography, every detail matters. From the angle of the light to the precise arrangement of elements within the frame, each decision influences how the product is perceived. This delicate balance between technique and creativity makes still life photography a true art form.
Feel free to contact us to discover how we can enhance your products through our lens and take your brand to new visual heights.
After the Shoot
Retouching is a crucial step in wine and spirits photography, but it is important to emphasize that a well-organized photoshoot is key to minimizing post-production work. A meticulous shoot allows you to:
- Significantly reduce retouching time
- Preserve the authenticity of the product
- Ensure superior image quality
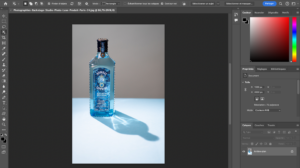
Key Retouching Steps
Even with an optimal shoot, some retouching is still necessary. Here are the essential steps, whether you are doing a quick edit with your smartphone or performing more advanced work. This is meant to present the steps rather than provide a detailed workflow.
Mobile Retouching (for Quick Adjustments)
- Adjust exposure and contrast
- Correct colors for an accurate representation of the product
- Crop to improve composition
- Use preset filters with moderation
Professional Retouching
- Monitor calibration for accurate color reproduction
- Fine adjustments to white balance
- Correct lens distortions
- Clean imperfections (dust, scratches)
- Precise adjustments of levels and curves for optimal contrast
- Selective sharpening to highlight important details
- Color harmonization for visual consistency
- Advanced retouching of reflections and transparencies
The Challenge of Retouching
Retouching photographs of wines and spirits presents unique challenges:
- Preserving the transparency and natural reflections of the glass
- Maintaining the authenticity of the product’s color
- Balancing the brightness of the label with that of the bottle
In Summary
At Rétines, we understand that every bottle, every wine, and every spirit has its own story to tell. Our expertise in still life photography allows us to capture the essence of these refined products, creating images that not only catch the eye but also evoke the senses of taste and smell.
Whether you want to showcase a grand cru or launch a new range of cocktails, our team is ready to take on the challenge, turning each photoshoot into a unique visual experience.
In the world of wine and spirits photography, every detail matters. From the angle of the light to the precise arrangement of elements in the frame, every decision affects how the product is perceived. This delicate balance between technique and creativity is what makes still life photography a true art form.
Feel free to contact us to discover how we can enhance your products through our lens and elevate your brand to new visual heights.
Jérémy Carlo is the editorial director at Rétines, where he ensures the consistency and clarity of all content produced by the studio.
Our Clients


Let’s discuss
What we do for you at Rétines
Meticulous work, an organised project and fast delivery. And to achieve this, we mobilise the right resources in our teams at the right time.
01
Pre-production
Artistic and technical direction tailored to the project.
Relevant recommendations on content, form and resources.
02
Photo Shooting
Photos taken by our experienced photographers.
Production that’s controlled, efficient and tailored to the needs of the project, with nothing superfluous.
03
Retouching
Technique
Photographs magnified by our retouching team.
Post-production to meet the commercial challenges of the brief.