
Remove the background from an image in 4 steps
In this article :
In the world of photo post-production, knowing how to remove the background from an image is an essential skill. Whether for e-commerce, advertising, or creative purposes, this technique allows you to highlight a subject by isolating it from its surroundings. Let’s explore the different methods to achieve this effectively, taking into account the specific needs of each project.
Why remove the background from an image?
Removing a background can transform an ordinary image into a striking visual. In e-commerce, for instance, it standardizes visuals to ensure a uniform presentation of products. Advertising professionals use this technique to integrate elements into complex graphic compositions. Content creators appreciate it for its flexibility in customizing images.
If you’re new to photo post-production, know that removing a background isn’t just about aesthetics; it’s also a strategic step to enhance visual impact.
Beyond aesthetics, background removal plays a strategic role in marketing and communication. For example, in e-commerce, a clean white or neutral background improves product consistency and customer trust. In graphic design and advertising, it enables creative freedom by allowing subjects to be placed into diverse environments or combined with other visual elements. This makes the technique not only a tool for clarity but also for creative storytelling.
Tools and Software for Removing Backgrounds
Photoshop: The Essential Tool
Photoshop is undoubtedly the most widely used software for removing backgrounds. With advanced features like the “Refine Edge” tool and layer masks, it offers unmatched precision. These tools allow even complex contours, such as hair or transparent fabrics, to be handled with finesse.
Online Automatic Solutions
For quick and accessible work, there are many online tools like Remove.bg or Canva. These platforms use AI-based algorithms to detect subjects and remove backgrounds in seconds. While convenient, these automatic tools sometimes struggle with complex images, requiring manual adjustments for an optimal result.
Mobile Applications
Apps like Adobe Express or Background Eraser also allow you to work on your images directly from your smartphone. Ideal for content creators looking for fast and on-the-go solutions, these tools are suited for occasional needs.
Types of Images Suitable for Background Removal
Background removal is particularly effective for product photos, portraits, and images where isolating the subject is key. In product photography, removing the background eliminates distractions and standardizes the look, often using a clean, white backdrop. Portrait photography benefits from background removal when models need to be placed in different contexts or for editorial purposes.
While images with simple, solid backgrounds are easiest to work with, advanced techniques now allow effective removal even from complex scenes.
Steps to Remove a Background with Photoshop
For those who want to refine their skills, here’s a step-by-step method using Photoshop:
- Import your image: Open your file in Photoshop.
- Select the subject: This is one of the most important steps. You need to clip your subject carefully. Be sure not to damage the subject itself, as this will affect the final result of your image.
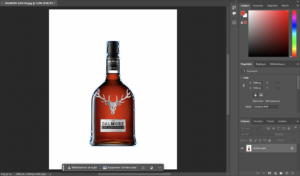
3. Refine the edges: Use the “Refine Edge” option for complex areas.
4. Apply a layer mask: This step will allow you to keep the ability to modify the selection later.

Once the background is removed, you can choose to keep the subject as is to incorporate it into various communication materials or on your website, for example. You also have the option to add the background of your choice:
- A solid background, reflecting your brand image.
- A background with a setting or ambiance to highlight the universe of your subject.
This technique is a fundamental aspect of photo retouching, essential for achieving a professional result.
Challenges you Might Faced in the Process
Despite advances in technology, some challenges remain. Intricate details like hair, fur, or semi-transparent objects can be difficult to isolate cleanly. Backgrounds similar in color or tone to the subject can confuse automatic tools, requiring manual intervention. Image quality also impacts results; low-resolution images limit precision and may cause jagged edges or aliasing.
Being aware of these challenges helps prepare for the time and skill needed to achieve professional results.
Mistakes to Avoid When Removing a Background
- Ignoring Details: Undefined contours or blurry edges can ruin the final result.
- Underestimating the Importance of Shadows: When removing the background, make sure to recreate natural shadows to give the subject depth.
- Using Low Resolution: A low-resolution image limits the quality of the cutout and the final rendering.
Additionally, removing a background can reveal lighting inconsistencies or imperfections in the subject that were previously masked. It is important to adjust shadows and highlights or retouch the image to maintain a natural and seamless look.
Tips to Improve Your Background Removal Skills
- Familiarize yourself with different selection tools like the Magic Wand, Pen Tool, and Quick Selection for varying precision needs.
- Use layer masks to make non-destructive edits, allowing you to adjust selections without losing image data.
- Zoom in and take your time to carefully refine edges, especially in complex areas such as hair or semi-transparent fabrics.
- Practice regularly to build skill and patience, these qualities are key for professional results.
Why Hire Professionals?
Although many tools allow you to easily remove a background from an image, entrusting this task to experts guarantees flawless results. At Rétines, we master all the necessary techniques to adapt your visuals to your needs. From the initial analysis to the final output, every detail is optimized for maximum impact.
Removing a background is not just about isolating a subject but seamlessly integrating it into a larger project. Trust professionals to transform your ideas into images that leave a lasting impression.
Jérémy Carlo is the editorial director at Rétines, where he ensures the consistency and clarity of all content produced by the studio.
Our Clients


Let’s discuss
What we do for you at Rétines
Meticulous work, an organised project and fast delivery. And to achieve this, we mobilise the right resources in our teams at the right time.
01
Pre-production
Artistic and technical direction tailored to the project.
Relevant recommendations on content, form and resources.
02
Photo Shooting
Photos taken by our experienced photographers.
Production that’s controlled, efficient and tailored to the needs of the project, with nothing superfluous.
03
Retouching
Technique
Photographs magnified by our retouching team.
Post-production to meet the commercial challenges of the brief.