The Best Tools for Architectural Photographers
In this article :
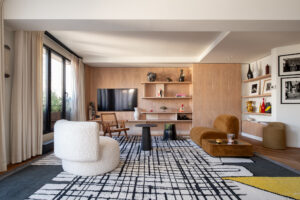
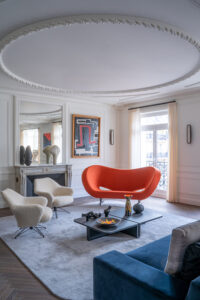
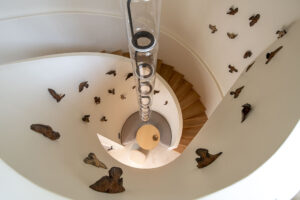
Architectural photography requires a keen eye for lines, perspectives, and details. But beyond artistic sensitivity, the success of an image also depends on the tools chosen. From the camera body to post-processing software, as well as lenses and accessories, every piece of equipment plays a role in the quality of the result.
Whether you are an amateur photographer looking to improve or a professional seeking precision, there are solutions suited to optimizing your architectural shots.
Essential Basic Equipment
The first step is to have a suitable camera body.
For an amateur photographer, a mid-range mirrorless or DSLR camera is sufficient. The important thing is to shoot in RAW to preserve all image information and facilitate editing.
For a professional, a full-frame camera is recommended. The wider dynamic range allows managing the contrasts between shadows and highlights, which are common in architectural photography, especially outdoors. High-resolution sensors (30 to 50 MP and above) are also an asset for capturing the details of façades, glass roofs, or complex interiors.
A sturdy tripod is also part of the basic kit. It ensures stable framing, facilitates working with straight lines, and allows the use of slow shutter speeds without losing sharpness.
Recommended Lenses
The lens is probably the most decisive tool in architectural photography.
- Wide-angle (14 to 24 mm on full-frame): allows capturing buildings in their entirety, both indoors and outdoors. But be careful with distortions, which are common with these focal lengths.
- Tilt-shift (shift lens): indispensable for professionals. It corrects perspectives and prevents the “falling lines” effect when photographing a building from a low angle. This technical tool adds credibility and significantly reduces post-processing work.
- Fast standard lenses (35 mm, 50 mm): useful for architectural details or more creative shots, with controlled depth of field.
The choice of lenses should reflect your practice: an amateur can make do with a well-managed wide-angle, while a professional will combine wide-angle and tilt-shift lenses to meet client expectations.
Useful Accessories
In architectural photography, small accessories can make a big difference.
- Bubble levels or electronic grid overlays: to check horizontality and avoid tilted images.
- Polarizing filters: very useful for reducing reflections on glass and enhancing sky contrast.
- ND (Neutral Density) filters: allow long exposures, for example, to remove pedestrians or vehicles in front of a building.
- Remote triggers: reduce vibrations when shooting, useful on a tripod.
- Sturdy, compartmentalized camera bag: essential for protecting and transporting equipment safely, especially during urban shoots.
These tools are not necessarily expensive, but they add real value by making fieldwork more efficient.

Editing Software
Capturing the shot is only one step. In architectural photography, post-production is essential to correct, refine, and enhance images.
- Adobe Lightroom: ideal for managing color, contrast, and batch processing large series of images.
- Adobe Photoshop: indispensable for complex corrections, including perspective adjustments or removing distracting elements.
- DxO PhotoLab or Capture One: interesting alternatives, offering excellent tools for optical correction and color rendering.
Editing is not about transforming reality, but faithfully representing what the eye perceives. Correcting distortion or balancing overly contrasted exposure is an integral part of an architectural photographer’s work.
Equipment Maintenance Tips
Well-chosen equipment also needs proper maintenance. Architectural photography is often practiced outdoors, sometimes in changing conditions (rain, dust, pollution).
- Regularly clean your lenses with a blower and microfiber cloth to avoid visible dust or marks on clear skies.
- Protect your sensors by avoiding lens changes in dusty environments.
- Use protective covers for your camera bodies and lenses in case of rain.
- Check tripod stability and tighten fittings to ensure longevity.
Well-maintained equipment not only lasts longer but also ensures consistency in image quality.
Conclusion
Architectural photography is not just about pressing the shutter. It relies on a set of tools designed to convey the grandeur of buildings, the elegance of lines, and the richness of details.
Camera body, lenses, accessories, software, and maintenance: every step matters for progress, whether you are a passionate amateur or an experienced professional. The key is to build a coherent, scalable, and practice-suited kit.
At Rétines, we support architects, brands, and agencies in showcasing their architectural projects with precise and impactful images, created using tools tailored to the demands of the profession.
Jérémy Carlo is the editorial director at Rétines, where he ensures the consistency and clarity of all content produced by the studio.
Our Clients


Let’s discuss
What we do for you at Rétines
Meticulous work, an organised project and fast delivery. And to achieve this, we mobilise the right resources in our teams at the right time.
01
Pre-production
Artistic and technical direction tailored to the project.
Relevant recommendations on content, form and resources.
02
Photo Shooting
Photos taken by our experienced photographers.
Production that’s controlled, efficient and tailored to the needs of the project, with nothing superfluous.
03
Retouching
Technique
Photographs magnified by our retouching team.
Post-production to meet the commercial challenges of the brief.